
Beauty
s’il vous plait
a how-to guide to the best braids.
Braids might not be a new hair trend, but they are certainly having their moment to shine. So many spring '14 runway shows used innovative and creative braid styles that we had round up the best ones not once, but twice!
Inspired by all the cool 'dos on the runway, we headed over to Bumble & Bumble's downtown salon to have the stylists re-create some of the coolest styles applicable for every hair type. So whether you're jonesing for a fishtail braid (which--surprise!--is really, really easy to get) or a Elle Fanning-style braid crown, we've got you covered.
Click through the gallery to find out how to do the fishtail and more from Bumble & Bumble's pros. We consider this one lesson you don't want to miss out on.

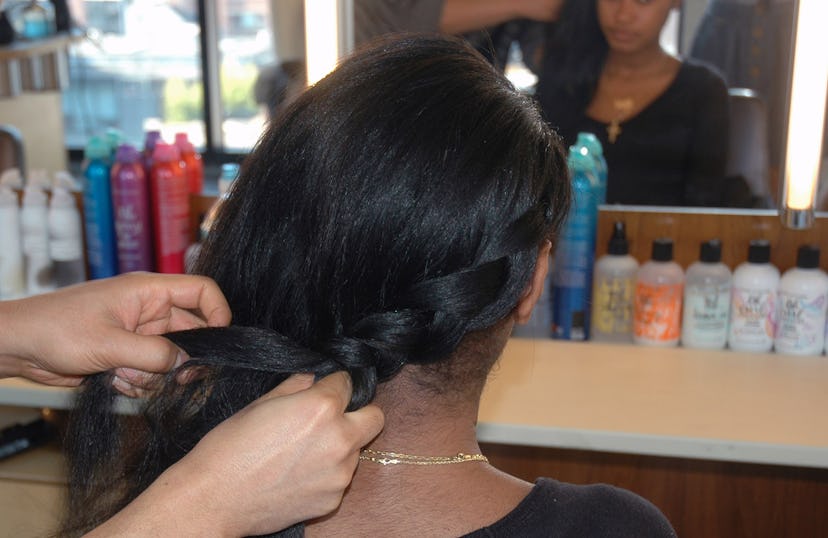
Got short hair? Try this look created for us by stylist Edward Lampley. Start by spraying Dryppun Thickening Spray.

Braid a cornrow braid (that's braiding over, not under) from one side, around the back of your head. Don't freak out if little pieces pop out--the messier the better!

Once you get to the other side, you can thicken your braid and loosen your grip.

Braid to above your ear and then continue braiding out. Secure the ends with a tiny hair elastic.

Go back through and pull the braid apart gently. This will create an un-done texture so that you're hair looks more ethereal than sporty.

The best way to "mess it up" is to pull on the outside edges of each plait. Don't pull too hard, though, you still want to keep your braid tight to your scalp.

Finally, pin up the little braid tail you had made underneath the braid across the back of the head. A classic hair pin works best for this.

Ta-da! You've got yourself an Elle Fanning-worthy braid!
For mid-length hair, a low side braid works best according to stylist Ivan Matsumoto. Start by finding your natural part in your hair and brushing the hair down. Then begin braiding cornrow-style from one side of your head to the other.

As you braid across, only add hair to the top sections of each braid, not the underneath. Don't worry about the braid being too tight to your head as you reach your other ear. A little looseness is good.

Once you reach your opposite ear and have all your hair in the braid, continue braiding down. Use a tiny hair tie to finish it off.

Get messy! Gently separate the braid for a more casual look.

Take the "tail" section and pin it underneath the braid with a couple of hairpins. Don't pull too tightly, you want to keep the braid loose.

Tuck the tail underneath the preexisting braid.

Voila! You've got yourself a dance bar-ready 'do.

Long haired girls, are you ready to fishtail? Stylist Edward Lampley convinced us that a mermaid braid is a lot easier to do than we thought.

Here's how it's done: Start with two sections of hair. Pick up a smaller third piece from the right side and carry it over the left. Tuck it underneath the left section section, and carry it back under to the right section. See? Easy!

Continue picking up from each side and wrapping underneath. When you run out of hair to pick up, just use an outer piece of each two sections and continue with the same movements.

Braid to the tips of your hair and fasten it off with a hair tie.

You're getting the gist that the messier your braid is, the cooler it is, right? Go through your fishtail and fold it outwards to loosen up the braid's tension.

Don't be scared to pull apart the braid a little either!

If you want to try a milkmaid style with your fishtail, wrap the braid across your head and secure one end with a hair pin. Continue to pin throughout, making sure that the pins are going in the opposite direction of your braid and are secured tightly.

Boom! We think this style looks even better with some ombre tips!
