Beauty
two ways to protect your natural hair this summer
keep your kinks and curls on fleek
Embracing your natural hair is a beautiful process, but let’s be real: It’s a lot of work, especially in the summer. (Who has time to wait for that twist-out to set when she’s trying to glo’ up poolside?) Fortunately, there’s a solution: protective styling.
“Protective styling” is an umbrella term for hairstyles that can, well, protect your hair from the elements. They can be as simple as a bun, as versatile as two-strand twists, and can offer as much coverage as a weave. Depending on how much of your hair is tucked away, these styles can prevent dryness and breakage, and actually promote hair growth. To put them to the test, two of NYLON’s very own naturalistas tried out protective styles to start their summers off on a hair-healthy note. Click through the gallery to see how they did it.

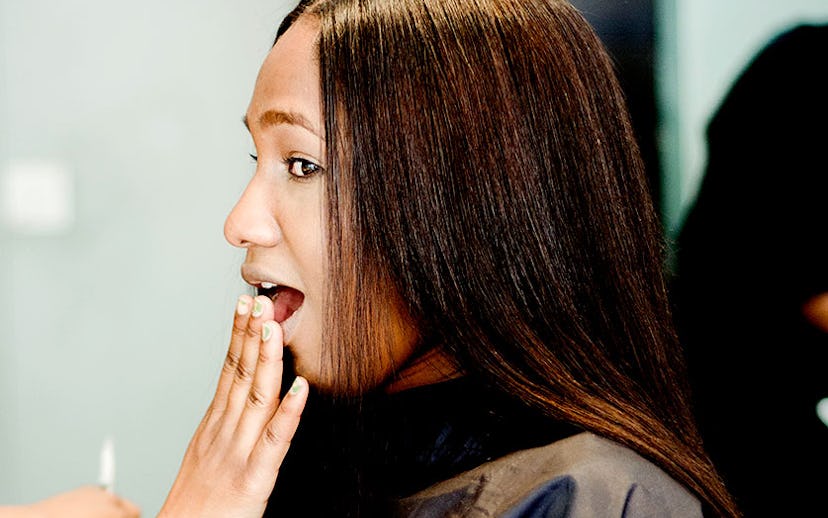
Simone Archer, executive assistant to the publisher: Sew-in Weave
Ever heard the saying, “Ask and you shall receive?" Well, honey, God heard my prayers and blessed me—and then some.
I had been looking for a new hairstylist ever since mine broke up with me and moved to Chicago. The last weave she installed for me held up pretty well against the rain, sleet, and snow of last winter, but once summer arrived, I was not looking as fabulous as I normally did without her. Just when I thought there was no hope for me and that I’d be banished to the Land of the Basics, Satia Rickett walked into my life. In addition to getting my hair laid to the gawds, I think I found my new weaveologist.
Hailing from Jamaica, Satia is the owner of The Beauty Loft and has been a working hairstylist for over 10 years in New York City. With those credentials, I knew she was the perfect person to bless my tresses, so I headed to her salon for a consultation.
During our meet-up, Satia taught me that there are three steps to a popping weave: Quality, installation, and maintenance. Then we started discussing styles, and decided to go for a dark-brown curly look. I was bubbling with excitement, but anxious at the same time; I’m particular about my hair, so finding a stylist that is able to execute my vision is difficult, and weaves are very expensive. I had no time (or money) for the games.

Finally, the Day of Reckoning came. Satia placed three large bundles of wefted Brazilian “Body Wave” hair in my lap. My fingers slid easily through the hair with no tangles and no shedding. Plus, there were no gray hairs (!). The color matched perfectly with my own, and Satia assured me that the hair was 100% virgin, meaning it wasn’t chemically treated, just cleansed. “The quality of the hair is the most important,” she said. “You want it to blend seamlessly with your own hair texture, and you want it to last.”
There are hundreds of ways to install a weave, which is why it’s better to see a trained hairstylist to determine the best option for you. While Satia offers a wide variety of installations from traditional sew-ins to keratin bonds, I chose the traditional sew-in method, due to my hair texture and the amount of time I usually keep my weaves in (four months—don’t judge me).
To prep for installation, my hair was cornrowed around my head, with the ends sewn to the braids. The sewing process took about one hour, and by the end I felt like Simba after he goes through puberty and grows a huge mane. I was fierce, honey! Satia then cut layers in the front and sides of the hair to frame my face in a way that would look Instagram ready regardless of whether I wore my hair curly or straight.

Having a quality weave doesn’t end at installation, however—maintenance is key. “Just because you have a weave doesn’t mean you neglect your hair underneath,” Satia advised. For upkeep, I’ve been spraying Shea Moisture Raw Shea Butter Extra-Moisture Detangler on the roots for strength, and use Shea Moisture Yucca & Plantain Anti-Breakage Thermal Protectant Serum whenever I blowdry or flat-iron the hair. Depending on how quickly my hair grows back, I’ll be returning to tighten my braids underneath the weave, secure it, and remain fabulous.

Keryce Chelsi Henry, editorial assistant: Single Braid Extensions
I have one fear: Having my edges literally snatched in a freak accident involving fake hair. So, to say I was apprehensive about having individual braids installed would be an understatement. But the summertime is the best time to rest my hair (and pretend to be Zoë Kravitz), so I decided to suck it up and try it out.
Naturally, I looked to the Box Braid OG, Janet Jackson’s character Justice in Poetic Justice, for inspiration and went for medium-sized, waist-length, silky braids. That called for four packs of Outré Jumbo Braid Kanekalon synthetic braiding hair—just $3 each at my local beauty supply—in color one to match my black hair.
Since it was my first time having braids installed (much less installing them myself) I decided to get some advice from an expert: Anu Prestonia, owner of Khamit Kinks in Brooklyn. With a 30-plus-year career in braiding hair, she was the perfect person to consult before my journey. “Single braids definitely can be worn as a protective style, as they allow your hair to rest so you don’t have to be involved with daily grooming,” she said. “On the flipside, though, you have to be careful with single braids because of how they’re put in—with a piece of your hair and then a piece of [braiding hair] that’s going to be slightly pulling on your hair as it grows out.”

With Anu’s advice in mind, I started installing my braids on freshly shampooed, deep-conditioned, and lightly blow-dried hair. Using a fine-toothed comb, I parted off a row of hair at the nape of my neck, then made a vertical part to square off a section, which I detangled. To prep the braiding hair, I cut the hair from each packet in half, pinching off sections based on the amount of hair I was braiding. Anu encouraged me to make sure that the amount of braiding hair I used was comparable to the section of hair that I was braiding, in order to prevent hair loss. She also advised me to taper the braiding hair, so I randomly pulled at the ends until it was layered.
When it came time to actually do the braids, things got tricky. It took several failed attempts (and a significant amount of time watching YouTube tutorials) before I could get the hang of braiding the Kanekalon hair into mine, ensuring that the braids weren’t too tight. But once I did, I continued the process until I finished braiding all of my hair...which took six hours. And was absolutely worth it.
For a more casual look, I varied the points at which I stopped each braid so the ends were left unbraided. To prevent them from unraveling, I dipped the braids into a bowl of boiling water, carefully removing and squeezing them with a towel after about 30 seconds. Finally, I “manicured” the braids, as Anu suggested, clipping off any hairs that stuck out for a smooth finish.

Of course, having a long-lasting protective style doesn’t mean I can neglect my hair, so every night I’ve been sleeping with a satin braid bonnet, and regularly spraying Shea Moisture African Black Soap Dandruff & Dry Scalp Elixir on my scalp and along the braids. Because laid edges are a must for me, I dab a natural gel (like the Soft Set Gel from Anu’s Anu Essentials line) along my hairline. And in order to prevent my number-one phobia from coming true, I’ll be re-braiding the front of my hair after four to six weeks and avoiding pulled-back styles.
Following Anu’s instructions, I won’t be keeping the braids in longer than 12 weeks: “At the 12-week period, the hair begins to lock. Then, when you try to comb it out, you’re going to be combing out your own hair, and your own hair is going to break because it’s knotted up.” Knowing how easily I get bored with my hair, I’ll probably be taking my braids out long before then. Until I do, though, I’ll be flipping my braids and reenacting scenes from ‘90s movies with no shame.
